Social media websites like Facebook, Snapchat and Instagram have radically transformed the way we interact with each other. Photos are a huge part of our online communications—instead of telling your best friend how you feel, you send them a selfie on Snapchat or Instagram. Instead of spending hours describing your last holiday trip, you tag your friends and family members on Facebook.
With the growing importance of photos in our daily lives, the need for them to be different and special has increased dramatically. We all add extra effects, filters and text to our photos to make them more appealing. Animated still photos is another popular trend among today’s youngsters and can be spotted frequently in social media feeds. There are multiple tools and apps for animating still pictures including Adobe Photoshop.
If you want to animate your still photos and are on the lookout for a good tutorial, this blog can help you. Read on for a step-by-step guide to animate still photos using Adobe Photoshop software.
What is Adobe Photoshop?
Adobe Photoshop is a critical tool for a diverse group of occupations including fashion designers, photographers, graphic artists, web designers and interior designers. This software application by the Adobe group is widely used for image editing, retouching, adding effects, creating image animations, image compositions and website mock-ups.
The Photoshop software is compatible with all major operating systems including Windows and Mac. It can also be downloaded on Android and Apple devices as an app. The tools provided with the software allow you to edit individual images as well as large batches of photos. The software also offers premium services like Photoshop Lightroom that can be used for a superior editing experience.
Animating still photos with Adobe Photoshop — a step by step approach
While you might assume that animating still pictures with Photoshop is a herculean task without the help of computer animation courses, it can actually be very easy if you follow the below steps:
Import the selected picture
First, you need to create a new 1000 × 525 pixel Photoshop document and import the photo you want to animate as a Linked Smart Object (LSO) by clicking on the Place Linked option from the File menu. Duplicate the LSO to create a second copy and place it at the top of the Layers panel.
Select the main subject and apply a layer mask
Select the Linked Smart Object copy at the top and use the Quick Select option from the toolbar. Choose the Select Subject button from the Options bar to adjust your first copy onto the second one. Once the adjustment is done, add a layer mask with the Add a mask button from the Layers Panel.
Placing your video
Choose the Place Linked option from the File menu to select a stock video from the list of Adobe videos. Then, position the video between the two LSO layers. Open the Time panel by clicking on the Timeline panel and extend the duration of the two LSO layers to match the video length.
Setting blend modes and opacity
Create transparency in the darker areas of the video by selecting the video layer, setting the blend mode to Screen and setting the Opacity levels (0-100%) as per your requirements. Subsequently, add a layer mask and apply a Black to White gradient to it.
Exporting your project
Choose the Render Video option from File>Export to create an animated photo file which can be uploaded anywhere on the internet.
Animating still photos can enhance their depth perception and give them a life-like quality. These photos can be uploaded easily on any social media website or attached as graphic files over an email.
If you’re interested in learning more about photography and photo editing skills, then the HNC Photography course offered by the London College of Contemporary Arts can be a great option for you. This photography and Photoshop course in London offers an overview of a wide array of photography disciplines and techniques such as Photoshop graphic design along with editing and post-production knowledge. Click here to learn more about the course.
This article was written by Sweha Hazari and edited by Anisa C.
 7 ways to improve your creativity as a graphic designer
  How Designs Impact our Lives
  How to gain strong leadership skills through business and management programmes
  5 Web-based design tools you can use to explore your creativity!
 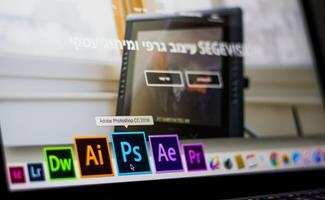 Top 10 Graphic Design Resources to Check Out